Knowledge Process

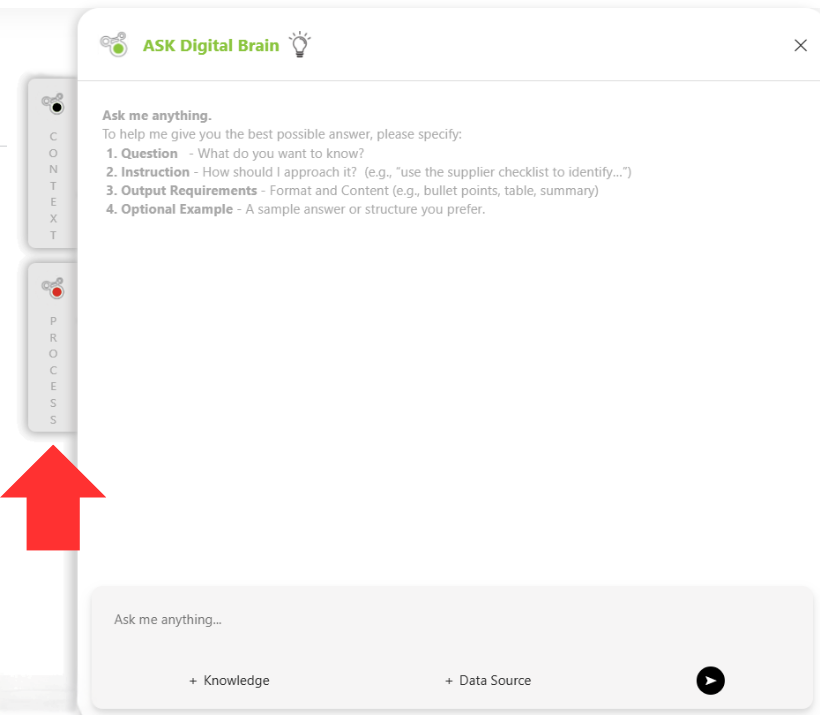
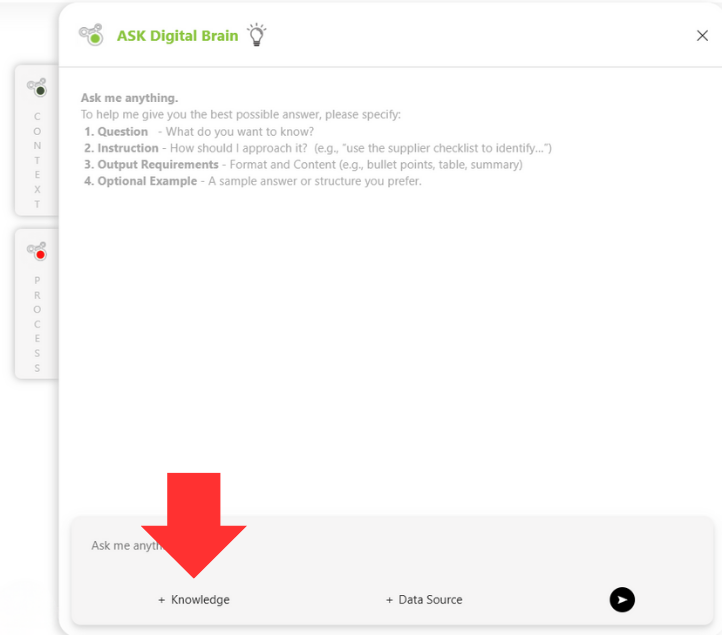
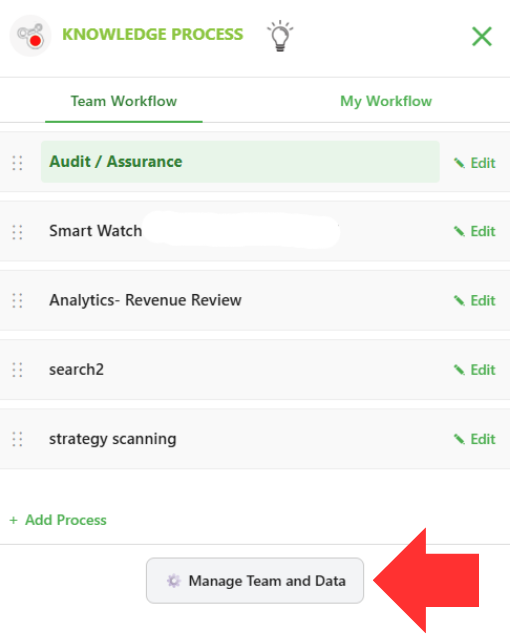
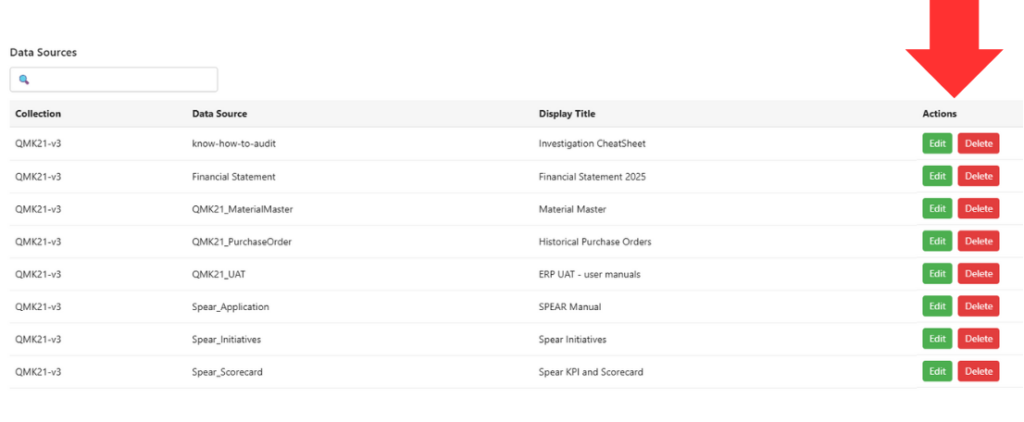
Knowledge workers follow their own processes for analysis, planning, design, and decision-making—work that goes beyond what transactional systems like ERP can do. Here, you can configure your team’s or your own knowledge processes, enabling consistent outputs and high-quality answers, even when using AI models that may respond differently depending on how questions are asked.

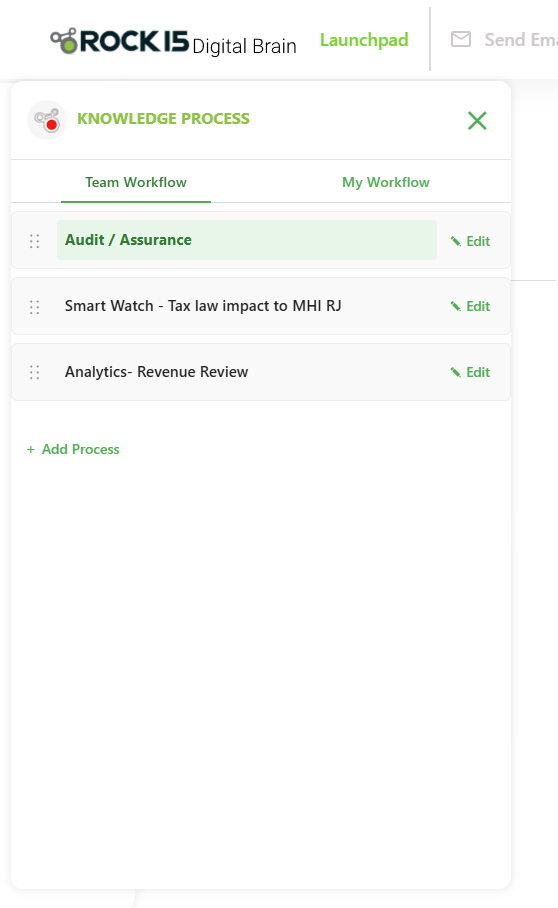
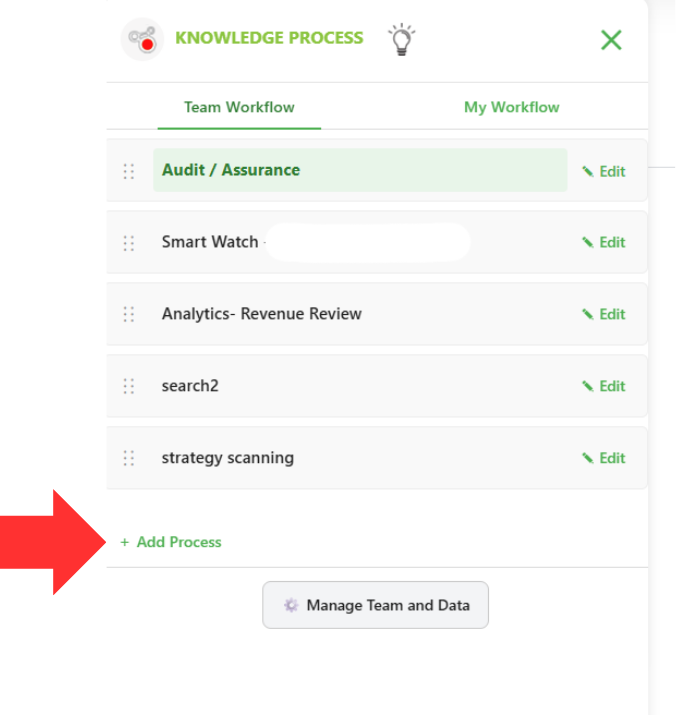
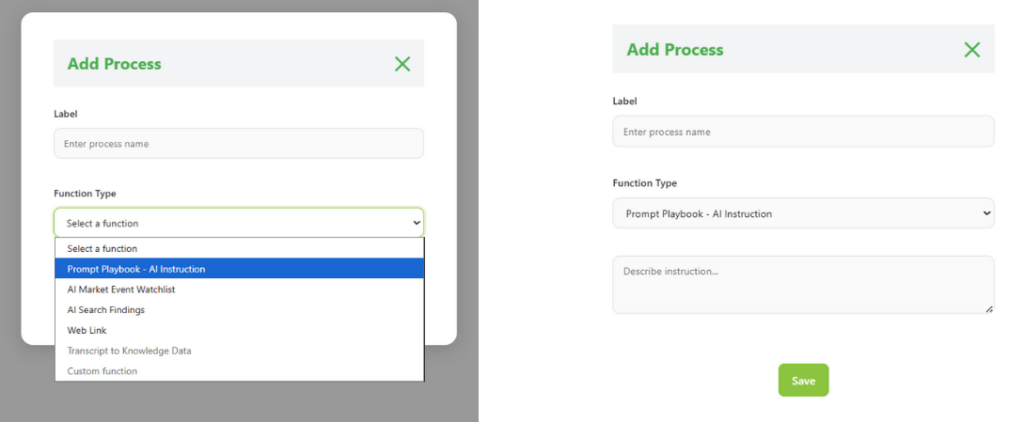
To get started, click the Process tab:

You’ll see two sections: 

  • Team Workflow – editable only by workspace owners, used to create and manage shared workflows. 

  • My Workflow – where any user can create their own private processes. 


To create a new process, click Add Process. 

Enter a name under Label, then choose a Function Type. Each function provides unique AI capabilities—almost like building your own software. 

For example: 

  • Prompt Playbook – AI Instruction allows you to register reusable AI prompt templates that you and your team can refine over time. 
    When you open the newly created workflow task, an instruction panel will appear where you can add and manage prompts. A prompt can be a simple question or a detailed report instruction describing inputs, outputs, format, and data requirements. For more details on adding instructions, please see Instruction.

  • AI Market Watchlist lets you run real-time web searches and connect the results to internal data. Simply describe what information you want AI to track; the Digital Brain engine handles the rest. 
    When you open the task, the Watchlist screen will slide in. You can run a scan, and AI will review hundreds of webpages and summarize them in a table. Select any item to view details or check multiple items and ask Chat follow-up questions for deeper analysis. Digital Brain keeps the conversation context, responding as if someone is assisting you 24/7. 

    AI Search Findings will allow customers to search supplier or product lists using the internal company data sources. 


  • You can also use Web Link to jump to other systems or webpages via URL for convenience. For deeper system integration, Rock15 offers customization services. 

    Rock15 will continue releasing new Function Types, enabling you to build AI-enabled knowledge tools at your fingertips—without an IT project. 

Knowledge

Before using the +Knowledge feature, it’s important to understand the two ways users can load data into Digital Brain. Each serves a different purpose: 

  1. Manage Team & Data – used by authorized workspace owners to upload critical corporate data that requires precision and controlled access. 
    Examples include general ledger records, sales order items, or sensitive information like a CFO’s salary. 

  1. + Knowledge– used by any user to load information from their local computer or personal notes. AI will use this data when relevant, but it has a lower priority than corporate data and won’t be forced unless you reference it directly. 


Click Knowledge to open a new window.

  • To add content

  • Add Text – type or paste information directly. Text pasted here is always used by AI, which is especially useful for “what-if” scenarios.  Please note:

  •  

    1. The text will not be shared and is available only to you.

    2. If you belong to multiple workspaces, you will still see the text content regardless of which workspace you are in, because it is associated with you—not with the workspace.

    3. AI will treat this text as priority data when generating responses.

Add File – click Choose Files, select your document, and then click the green Upload button. Your files will appear in a list with their name, status, size, and upload time. To remove a file, click Delete. Please note:

    1. AI will treat these files as second-priority data when generating responses. For your information:

      • 1st priority: Data from Manage Team and Data
      • 1st priority: Add Text in Knowledge
      • 2nd priority: Add Files in Knowledge

    2. Uploaded files are not shared and are available only to you within your workspace. 

When you’re ready, select up to three Knowledge items and click Apply. 
To exit without making changes, click the X in the top-right corner. 

Then, simply ask your question in the chat. The selected Knowledge will help AI provide more accurate and contextual answers. 


Instruction

Instruction allows you to register reusable AI prompt templates that you and your team can refine over time. When you open a workflow task, an Instruction panel appears where you can add and manage these prompts. A prompt can be a simple question or a detailed reporting instruction that defines inputs, outputs, format, and data requirements. 

To access your prompt templates, click Instruction. Here, you’ll see the list of instruction sets you’ve created, or you can add a new one. 

Instructions are stored within each workflow task in the knowledge process. The task you’re currently working in will be highlighted. 
If you want to store instructions under a different task, simply select that task. 
If the Instruction panel doesn’t automatically appear, click Instruction again—this can happen when a task has dual functions, such as Smart Watchlist or Web Link, where Instruction is the secondary feature. 

To create a new Instruction, click Add, then enter a title and a description explaining how the instruction should be used. When you’re done, click Save. 

You can select up to three instruction sets at a time.

Click Apply to activate them for your workflow.

Data Source

Data Source shows you the list of corporate data that is available and assigned to you. These datasets come from your workspace owner, corporate admin, or integrated corporate systems. They include critical information that requires precision and controlled access—such as general ledger records, sales order items, or sensitive data like a CFO’s salary. 
AI prioritizes this data over external knowledge or personally uploaded Knowledge files. 

To begin, click Data Source. 
In most cases, you don’t need to select anything—the AI will automatically use the appropriate corporate data. 

If you’re not getting the response you expect, and you know a specific dataset is needed—such as historical purchase orders stored in Data Source—you can manually select up to three data sources. 
After selecting them, click Save Selection. 
This forces the AI to pull information specifically from those sources. This is especially useful when the data is numeric or highly structured, rather than descriptive text. 

One important note: 

  • Corporate Admin can assign data across all workspaces (teams). 

  • Workspace Owners can only assign data that belongs to their workspace. 

Any special dataset assigned by the Corporate Admin will appear in your Data Source list. 

Manage Team and Data

This is where workspace owners can manage both data and team members. Before explaining the features available here, let’s start with a quick overview of authorized user types: 

  1. 1. Corporate Administrator 

  1. 2. Workspace Owner (or Team Owner) 

  1. 3. User 

The “Manage Team and Data” function is available only to workspace owners. Workspace owners are authorized to view: 

  1. 1. Data assigned exclusively to their workspace 

  1. 2. Users within their workspace 


Workspace owners can upload data and assign it to specific roles, which can then be applied to each user. The AI will use only the data assigned to that user when performing its tasks. 

What types of data should workspace owners upload? 

It is strongly recommended to upload critical corporate data that requires accuracy and controlled access. Examples include: 

    • Practice playbook (Way of Working, tips, know-how)
    • Strategy documents
    • Design documents
    • Policies and process documents 
    • Supplier certificates
    • Facility or asset master data
    • General ledger records or financial statements
    • Sales order items
    • Other sensitive or business-critical information 


Once data is uploaded and assigned, it becomes visible from the Data Source button in the AI chat. 

Step 1. Data Load 


This is where you can create or select data collection (group of data), select or create data sources (manageable data item set), and upload Corporate Data Files which can be assigned to Roles and Users. 

First, select or create a collection. To create a new collection, click Add. 
 
Then, specific Data sources can be assigned to that collection by selecting titles. By pressing Add a new data source name can be created.

Corporate Data Files can be uploaded too by pressing Choose Files and selecting the files to be uploaded. Click Upload below to upload the files. You can upload multiple files at once but the file size is limited to 10 Mb for workspace owners 

Step 2. Data Source 

This is where you can view, edit, or delete data files. 

  • Select Edit to change the display name. 

  • Select Delete to remove a data file. 


  • Note:

  • If you create a new data source or delete a data source, it will typically take around 40 seconds to appear in the data source list. You may refresh the page or navigate to other tabs in the meantime.


If you are creating a data source for the first time, make sure to add a display title. 
Without a display title, the data source will not appear in the AI Chat’s Data Source list. 

Step 3. Roles 

This is where data sources can be assigned to various roles. These roles can in turn be assigned to specific individuals to work with. 


Click Add Roles on the right to create a role. 

From there, enter the name and description before pressing Save. 

To delete the role, select it by checking the box next to the name and press Delete. 


Step 3. Roles 

This is where data sources can be assigned to various roles. These roles can in turn be assigned to specific individuals to work with. 


This is where you can view users by their names and email addresses. 
The workspace owner can select any user and assign one or multiple roles to them. 

You can also delegate the workspace owner role to another member. A delegated workspace owner will have the authority to upload and manage data in this section. Please note adding users is deactivated unless the user is authorized.